Thursday, December 20, 2012

Felt Snowman

This felt Christmas Tree is all the rage on Pinterest. We made one last year, but I was too cheap this year to go out and buy new felt. And since my 12 Days of activities is based around using things you probably have around the house, I decided to do just that!

I had a bunch of white felt left over from the Halloween costume I made Liza so I decided to create a "Build Your Own Snowman" activity instead.

Felt Snowman

Materials:
  • Felt piece for backdrop (I had blue on hand)
  • White felt cut into three circles
  • Cut out felt snowman pieces (hat, eyes, nose, etc.)
Procedure:
  • Try it once with your kiddos and then turn the reigns over to them
I'll admit that I did this in just a few minuets and didn't try very hard to make the accessories and pieces to be cute! And I didn't have orange for a carrot nose. Isn't that sad? Oh well, she doesn't seem to mind.

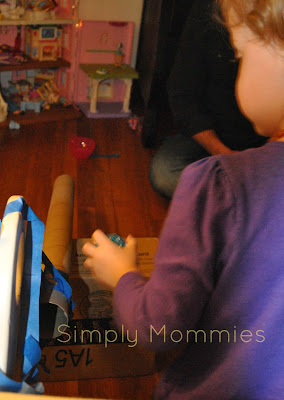
I simply clipped up my backdrop to Liza's easel (you could tack it to your wall too) and let her assemble the snowman however she wanted.

Yah, that yellow spoon looking thing was supposed to be a pipe. Liza didn't see the resemblance :)


I haven't offered any instruction or guidance since this is all for fun. Who cares if she didn't put the circles in order of size. It's all okay.

Although, that is a great activity extension :)


I'll be back with a few more simple activities this week. I am pretty sure I won't finish all twelve, but I will try!

XO Sarah


Wednesday, December 19, 2012

Gift Tag Sort

I have an abundance of gift tags thanks to Target's super awesome after Christmas clearance. I haven't had to buy them in years. The other day I was wrapping a few gifts and Liza discovered my collection of them.

And a new activity was created. And I didn't have to do a thing. Can't beat that!

Materials:

  • Gift tags (or anything you have)
Procedure:
  •  Dump out the gift tags
  • Let your toddler sort them 
  • OR for younger toddlers, dumping them out of a container and putting them back it would be very entertaining.


Have fun sorting and matching!!

XOXO Sarah

Tuesday, December 18, 2012

Heartbreak

Good afternoon, my friends.

We haven't been around the past few days because our hearts have felt too heavy. Our hearts are broken for the tragic and senseless loss of 20 beautiful children not too far from where we live. Our hearts ache as we think of the pain and helplessness their families must be feeling. We also grieve for the teachers and staff whose lives were selflessly given as they tried desperately to protect their students. Their children.

As a (former) teacher, I can tell you that your students become your children. For so many hours a day, you are their caregiver.

Their protector.

Oh gosh, I sob when I think of how the teachers must have felt. Their minds racing to figure out the fastest way to get their students to safety.

And my mind can't help but go there-this could have easily happened in my classroom while I was teaching. This could have happened in my niece's school. It could happen when my babies are in school.

Teachers don't just teach their students things out of a book and go home at night and forget about them. They are constantly on your mind. You wonder what/how you can approach subjects to help them to better understand, you wrack your brain thinking of ways to make them love learning, you come up with creative behavioral plans. Your job doesn't end when the bus pulls away from the school. It doesn't stop on school vacations. A teacher is always caring and thinking of his/her students. Teachers don't teach for the paycheck (which isn't much!). They teach because they love the children.

I wish more people knew this about teachers.

This tragedy has hit me very hard. I think a lot of people feel this way.

I have a group of friends that have inspired me greatly. They are doing things like paying off a family's lay-a-way in honor of the children who lost their lives. I want to do something to help too.

Ann Curry has challenged the nation to commit "20/26 Acts" of kindness in honor of each child and staff member, and I have decided to accept the challenge.

Take a few seconds to watch her interview here.

Today I brought cookies and party supplies to the preschool classroom where I used to work. It didn't cost me more than a few dollars and it felt good to do something simple for a group of children.

I am also choosing to smile through my tears and celebrate Christmas with gusto. I owe it to those babies to carry on.

Thoughts and prayers to you all.

I'll be back this week with the rest of my 12 days of Christmas toddler activities :)

XOXO Sarah


Friday, December 14, 2012

In Respect

In honor of the terrible tragedy that has happened in CT today, there will be no blog post from us.

Please, please keep these families who lost children and loved ones today in your prayers.

Hug your loved ones.

Photobucket

Wednesday, December 12, 2012

Snow Paint

 
It's Wednesday! We're getting closer to the weekend :)
 

The weather here in Rhode Island hasn't felt very Christmas like. In fact, it has felt a lot like spring. Rain and temperatures in the 60's. I can't complain too much because come January and February I will be wishing for weather like this, but around Christmastime we just like a little snow around here!
 
I found this tutorial (I really love her snowflakes...I just didn't have time to get that fancy!) on Pinterest a few weeks ago and decided to give it a whirl. This project cost me less than $2.00.
 
Materials:
  • White foam shaving cream
  • White glue (we used Elmer's)
  • Paper
  • Paintbrushes
  • Glitter would be a super fun addition!
 
 
Procedure:
     
  • Mix equal parts shaving cream and glue in a bowl
  • Paint away

 
Liza was very excited to paint with her "snow."


The paintbrushes didn't make it too long. Using her hands was more up her 2 year old alley.

 
It was neat to listen to her explaining to me what the "snow" felt like. This conversation was unprompted and I loved every second of hearing words like sticky, fluffy and goopy come out of her mouth. It's the teacher inside of me :)

 
It took a while for these paintings to dry, but when they did it was pretty neat. The goopier parts dried nice a fluffy and it gave the illusion of snow. Liza decided to experiment with one of her pictures by peeling all the fluffy parts off. Added sensory experience, I guess!


I think that even big kids would like this activity. The would probably enjoy making a snow scene or some fun snowmen.

Try it out!

XOXO Sarah

Tuesday, December 11, 2012

Ramp Fun

In yesterday's post, I helped you use up some of those wrapping paper scraps you had laying around and today I want to show you how I used an empty wrapping paper tube to entertain my kiddo.

 
Ramp/Tunnel Fun:
 
Materials:
  • Empty wrapping paper tube
  • Small ball or matchbox car
  • Painters tape 

 
Procedure:
  • Tape or prop up your wrapping paper roll
  • Let your kiddo send down a ball or car


When the hubby came home he told me it was a great idea, but he could make it way better.

 
 So, Mr. Engineer propped up the tube on a box and then added a little bowl (which he filled with rice to weigh it down) so that Liza could try and roll the ball down the ramp and into the bowl.


She thought it was pretty dang cool. Jumping up and down and cheering for her ball. 


I think daddy had just as much fun. Even though he won't admit it...


Just to be clear, I could have TOTALLY thought that up on my own, but you know, I was too busy. Busy making lasagna for dinner so I thought I did a pretty decent job keeping her busy so I could layer that sauce, meat, and cheese masterpiece up! Hehe :)
 
XOXO Sarah


Monday, December 10, 2012

Wrapping Sensory

It's Monday and Christmas is creeping up on me!

Do you have a lot of wrapping paper scraps laying around? If so, they will make the perfect filling for a sensory box!

Wrapping Paper Sensory Box:

Materials:
  • Wrapping paper scraps
  • Kid scissors
Procedure:
  • Throw some wrapping paper (maybe add some tissue paper too!) into a container
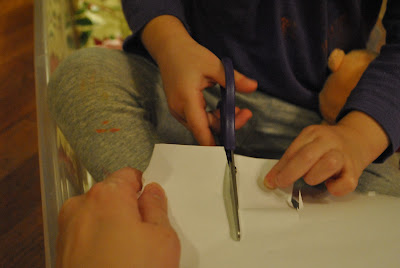
  • Let your kiddo tear and/or cut it into pieces
 
You could tear it up before putting it in or let your tot have at it with a pair of scissors.

 
In the past,  I have also added tape and small boxes and created a wrapping station (or maybe make it part of Santa's Workshop!), but although I  am sure my girl would love to get her hands on some tape, I skipped it. Maybe next year.


Ya, she liked sitting INSIDE the box.

 
This is an activity that I only take out when I am around to supervise Liza with her scissors. I practiced with her and helped her to properly handle them. 

 
She insisted on holding her new Winnie the Pooh the whole time :)


That's what is inside our sensory bin at the moment, but it will soon change. I hope to whip up something fun in there before the North Pole party I am throwing for a few of Liza's toddler friends!
 
 
XOXO Sarah


Friday, December 7, 2012

Jingle Bell Painting

I love Fridays, don't you?

Today marks the start of my 12 Days of Christmas Activities for your tots! I'll post one or two ideas  for the next few blog posts. I will keep it real with you. Nothing fancy and nothing that costs much money (if it costs any at all!).
 
Jingle Bell Painting:
Materials:
  • paint
  • jingle bells
  • paper
  • box or cookie sheet/brownie pan (something to contain the mess)
  • a kid to do the dirty work
 
Procedure:
  • Put a piece of paper inside a box or pan of some sort.
  • Dip the bells into some paint and then place the bells in the box.
  • Shake the box so that the bells roll around and paint the paper.


Liza preferred to "stamp" the bells on the paper. I think this was the case because the bells that I had on hand were pretty small and didn't roll around as well as I had imagined. I've never used bells before for this (usually marbles), but when I do it in the future I will find some larger bells so that the roll easier and jingle louder.

 
This is serious business my friends. 
 
 
The final product. It might turn into Christmas tags or a card once it is dry.


Christmas Fine Motor:

This activity just sort of fell into my lap. Miss Liza was begging me to play with some play dough so I took it out while I finished with my Christmas decorations. She was busy rolling and using cookie cutters when she found my faux berry garland and started picking off the "berries."

I automatically wanted to stop her, but soon realized it was a good fine motor activity for her. Why not lose a few of the already dingy berries?!

Materials:
  • play dough
  • something small (in this case berries)
Procedure:
  • Let your kiddo stick small objects into play dough


Super simple. Don't run out any buy anything. Use things you have at home already. How about popcorn kernels or elbow noodles? Anything goes!

Have a wonderful weekend. I'll be back Monday with some more ideas!!

XOXO Sarah

P.S. None of my ideas are ever original. These kind of activities have been around classrooms for ages. I won't take credit for them ;)

Monday, December 3, 2012

One Year

Today marks the year anniversary of my grandmother's passing so I thought I would re-share my Mother's Day post that I wrote in her memory.

So if you're interested, please read a little about my grandmother, Dorothy May.

XOXO Sarah